CDNCruiser
Recreation Professional
- Joined
- Feb 9, 2009
I've been getting lots of requests for my instructions, so I thought it might be easier for everyone if I just posted them! Here they are!
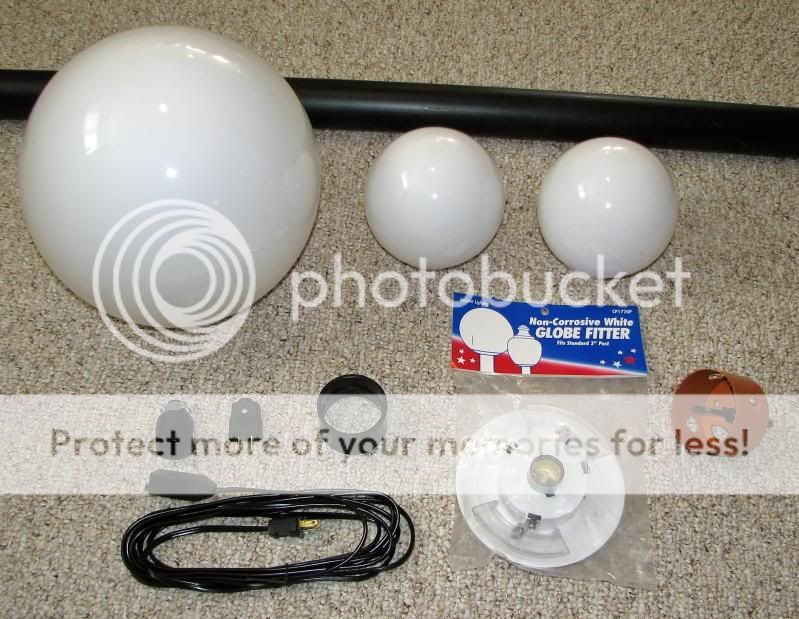
All the parts you need are available at Home Depot.
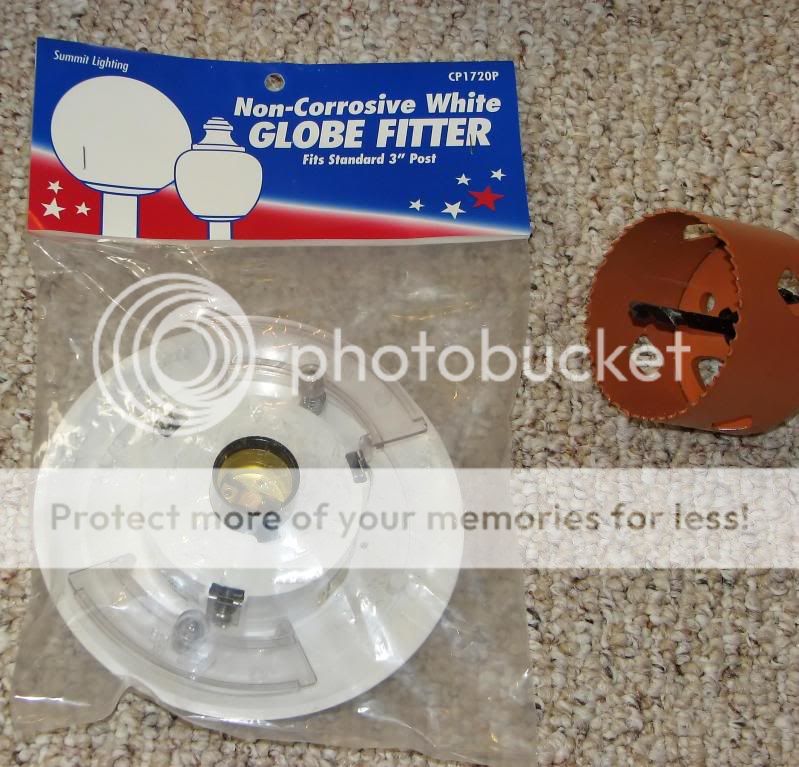
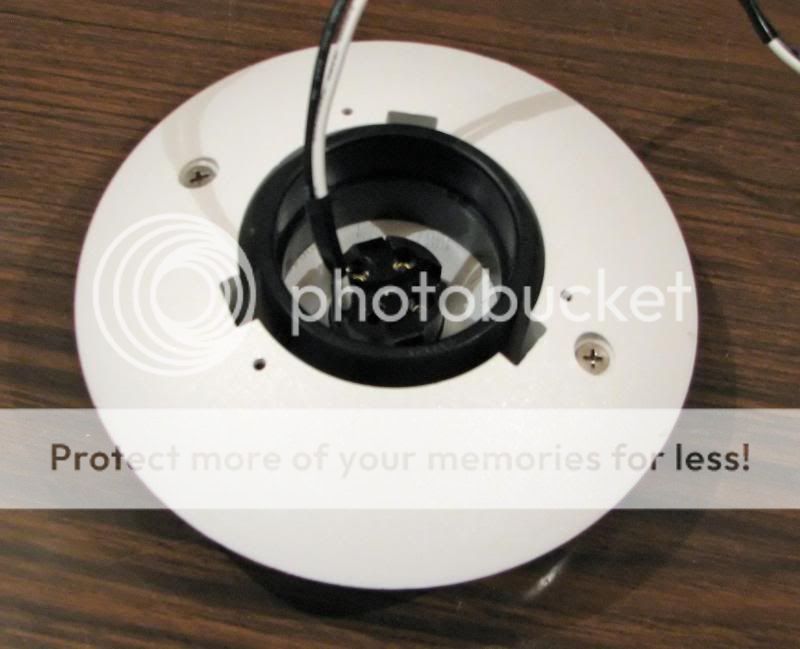
Here's a close-up of the globe fitter and the hole saw:
The key parts are:

If you cannot find these items in your local Home Depot, go to the Home Depot web site and search for Product number 100671529 (globe fitter) and 100671507 (12" globe) and 100671525 (6" globe). The URL is: http://www.homedepot.com
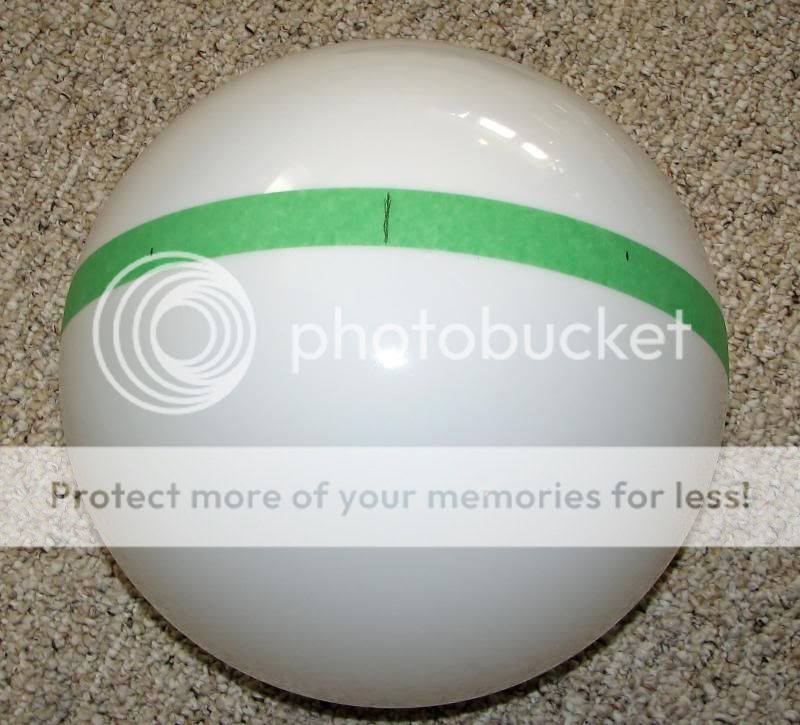
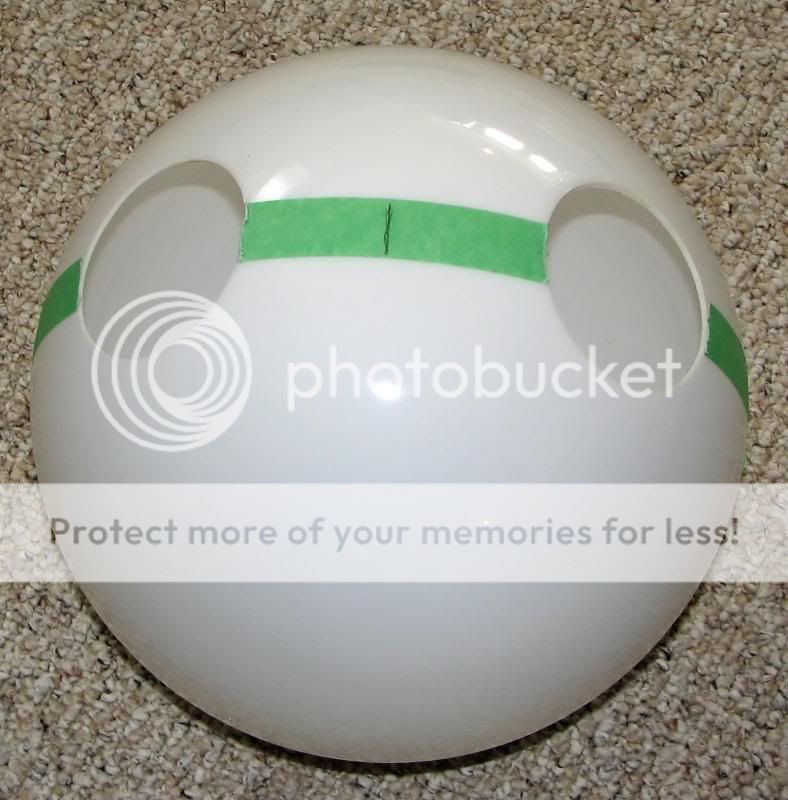
Begin with the 12 inch globe. Apply masking tape across the top of the globe along the center line in order to mark the centers for the holes needed to mount the smaller globes. Draw a line at the top dead center of the lamp and then measure down 4 inches on each side and make another mark. This will mark the centers for each ear hole, the centers should be 8 inches apart.
Drill a small lead hole for each ear and then use a 3 ¼ inch hole saw to cut the ear holes.
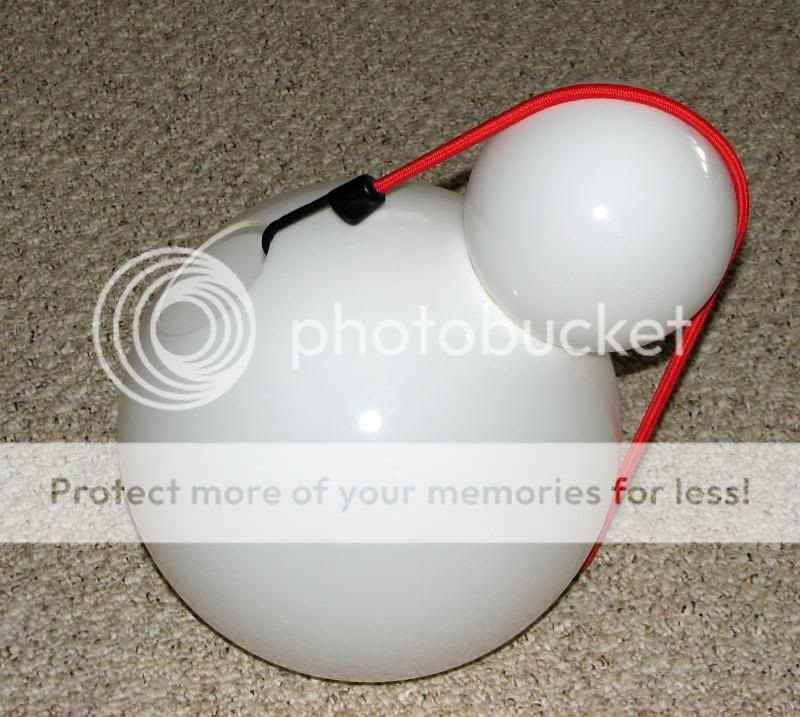
Remove the tape and glue the smaller globes into these holes, clamp until the glue is set.
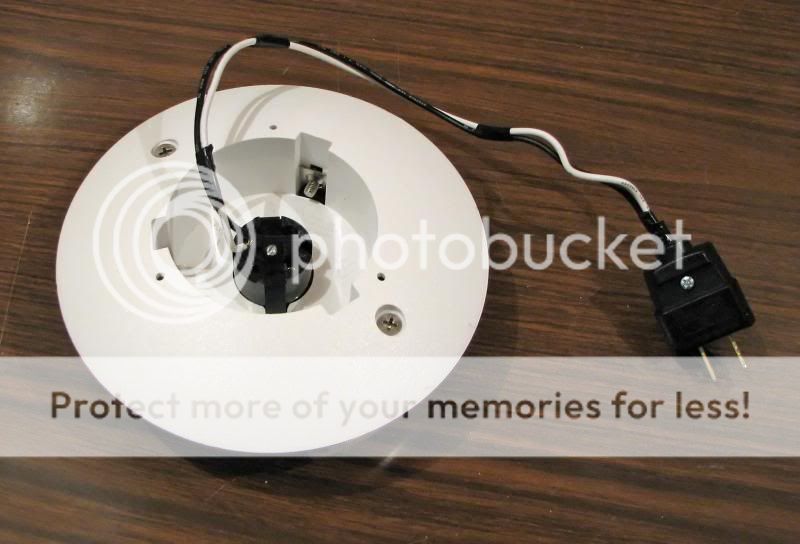
Attach a standard plug to the globe fitter.
Now you need to attach the globe fitter to the post. I used a 2 inch piece of ABS drain pipe as my post. The mount is simply an ABS connector which joins 2 pieces of ABS pipe. First remove the three clamp screws from the fitter. You are going to replace them with 1 screws.
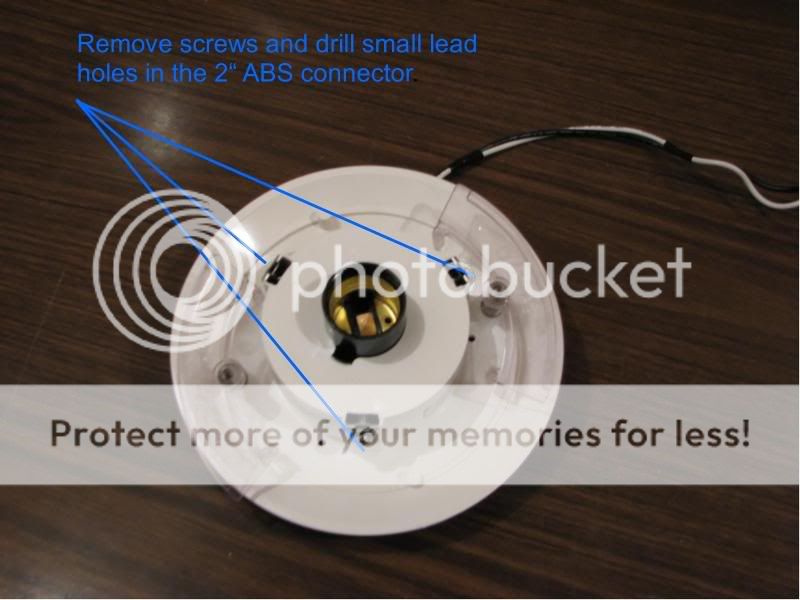
Now turn the globe fitter over and insert the ABS connector into the hole on the bottom of the globe fitter. It's a very loose fit. Drill small lead holes through the holes where you removed the clamp screws.
Use three 1 screws to attach the connector to the globe fitter. Tighten the screws to centre the connector in the hole and secure it. The globe fitter assembly will now slide on and off the ABS drain pipe which will be your post.
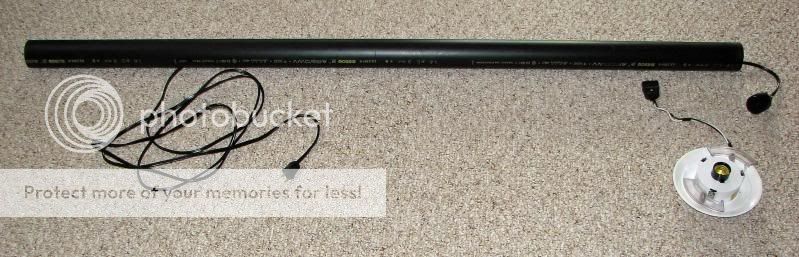
Now drill a ½ inch hole about a foot from the bottom of the ABS pipe and feed the power cord up through the pole. Add male and female plugs to the ends of the cord and you are done.
Plug the fitter into the female receptacle you just added, slide the globe fitter onto your post and install a 25 watt frosted light bulb. Place the globe on the fitter and enjoy your lamp.
You will need to devise a base for the lamp. I used a cast metal base for a patio umbrella (WalMart about $20.00). You simply use a chisel to knock off the nut which holds the retaining bolt and the ABS post slides over the post on the umbrella base. I secure it with two long bolts and wing nuts. Be sure that your base is heavy enough to prevent your lamp from blowing over. The umbrella base has worked very well for me.
On my last few lamps I have added smaller bulbs to illuminate the ears as well as the larger globe.
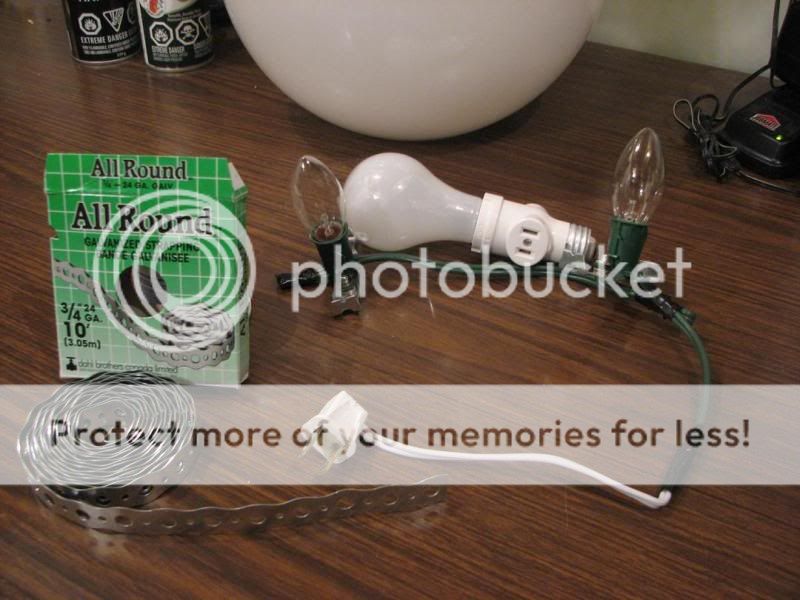
Begin with a piece of metal strapping, about 4 inches long. Bend about ¼ inch on each end so that the ends will create a friction grip on the flange of the 6 globe which is now visible inside the 12 globe.
Make 2 of these pieces, one for each of Mickeys ears.
Cut a length of outdoor Christmas lights so that you have 2 socket and enough cord on one end to attach a plug. Use pop-rivets to attach each socket to one of the metal straps you just made. Attach a plug.
Your assembly should look like this.
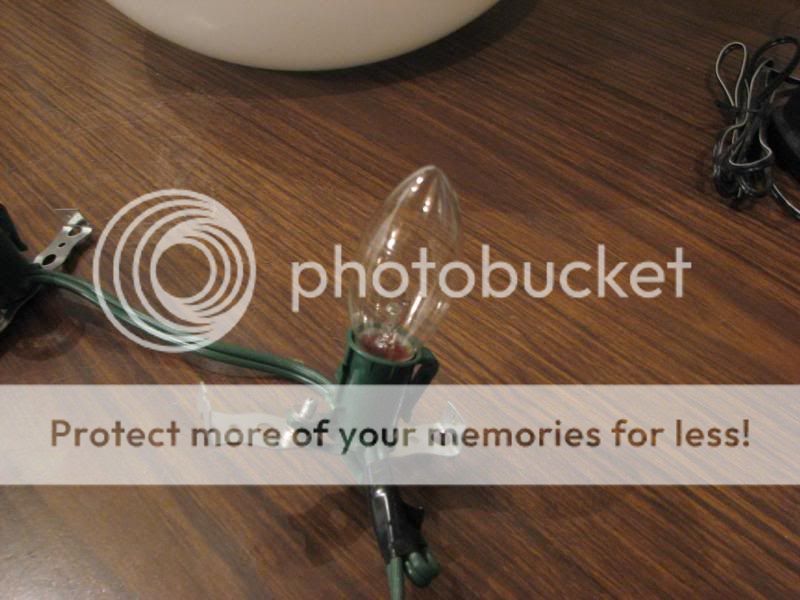
Here is a detailed look at the light socket riveted to the strap. Note the 90 degree bends in the ends of the strap which provide a friction grip on the flanges of Mickeys ears, inside the larger globe. Bend them to provide a snug fit and just press them on.
ENJOY!
Gary Cruise, Kingston, ON November, 2009
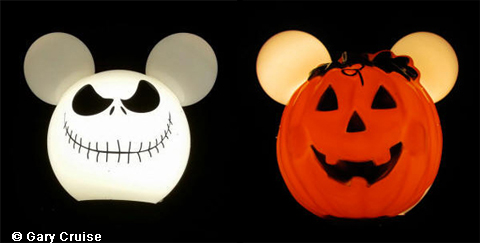
Here is a picture of my finished lamp. You can see how the patio umbrella base looks!

How to Make a Mickey Lamp
All the parts you need are available at Home Depot.
Here's a close-up of the globe fitter and the hole saw:
The key parts are:
If you cannot find these items in your local Home Depot, go to the Home Depot web site and search for Product number 100671529 (globe fitter) and 100671507 (12" globe) and 100671525 (6" globe). The URL is: http://www.homedepot.com
Begin with the 12 inch globe. Apply masking tape across the top of the globe along the center line in order to mark the centers for the holes needed to mount the smaller globes. Draw a line at the top dead center of the lamp and then measure down 4 inches on each side and make another mark. This will mark the centers for each ear hole, the centers should be 8 inches apart.
Drill a small lead hole for each ear and then use a 3 ¼ inch hole saw to cut the ear holes.
Remove the tape and glue the smaller globes into these holes, clamp until the glue is set.
Attach a standard plug to the globe fitter.
Now you need to attach the globe fitter to the post. I used a 2 inch piece of ABS drain pipe as my post. The mount is simply an ABS connector which joins 2 pieces of ABS pipe. First remove the three clamp screws from the fitter. You are going to replace them with 1 screws.
Now turn the globe fitter over and insert the ABS connector into the hole on the bottom of the globe fitter. It's a very loose fit. Drill small lead holes through the holes where you removed the clamp screws.
Use three 1 screws to attach the connector to the globe fitter. Tighten the screws to centre the connector in the hole and secure it. The globe fitter assembly will now slide on and off the ABS drain pipe which will be your post.
Now drill a ½ inch hole about a foot from the bottom of the ABS pipe and feed the power cord up through the pole. Add male and female plugs to the ends of the cord and you are done.
Plug the fitter into the female receptacle you just added, slide the globe fitter onto your post and install a 25 watt frosted light bulb. Place the globe on the fitter and enjoy your lamp.
You will need to devise a base for the lamp. I used a cast metal base for a patio umbrella (WalMart about $20.00). You simply use a chisel to knock off the nut which holds the retaining bolt and the ABS post slides over the post on the umbrella base. I secure it with two long bolts and wing nuts. Be sure that your base is heavy enough to prevent your lamp from blowing over. The umbrella base has worked very well for me.
On my last few lamps I have added smaller bulbs to illuminate the ears as well as the larger globe.
Begin with a piece of metal strapping, about 4 inches long. Bend about ¼ inch on each end so that the ends will create a friction grip on the flange of the 6 globe which is now visible inside the 12 globe.
Make 2 of these pieces, one for each of Mickeys ears.
Cut a length of outdoor Christmas lights so that you have 2 socket and enough cord on one end to attach a plug. Use pop-rivets to attach each socket to one of the metal straps you just made. Attach a plug.
Your assembly should look like this.
Here is a detailed look at the light socket riveted to the strap. Note the 90 degree bends in the ends of the strap which provide a friction grip on the flanges of Mickeys ears, inside the larger globe. Bend them to provide a snug fit and just press them on.
ENJOY!
Gary Cruise, Kingston, ON November, 2009
Here is a picture of my finished lamp. You can see how the patio umbrella base looks!