Example of Nighttime Photos at WDW

Geoff_M

DIS Veteran, DVC Member, "Cum Hoc Ergo Propter Hoc
Joined
Sep 13, 2000
I mentioned the techniques in this thread: http://disboards.com/showthread.php?s=&threadid=380583 , but thought people might like to see what I was talking about. The photos below were taken in January 2003 with my 2.1 mega pixel Nikon CoolPix 950. I used the "fine" Jpeg format (highest quality). Ambient light (no flash) was used and the exposure ranged in length from 1/3 to 1 second in length. ISO setting was the slowest possible (less noise) and the exposure meter was set on the usual "auto" mode. I used Photoshop to reduce the images to 72 dpi and resized them to 7 to 8 inches in maximum demension. The were saved at 40% quality Jpegs for uploading.

lowlight1.jpg


Osborne Lights... Used a trash can top to steady the camera.


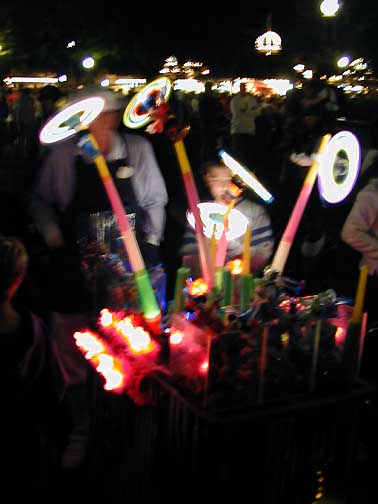
lowlight2.jpg


Sometimes blurry is good! Here's about a 1 second exposure of one of the carts that sells light-up goodies before FITS at MK. I was using the camera hand-held here.


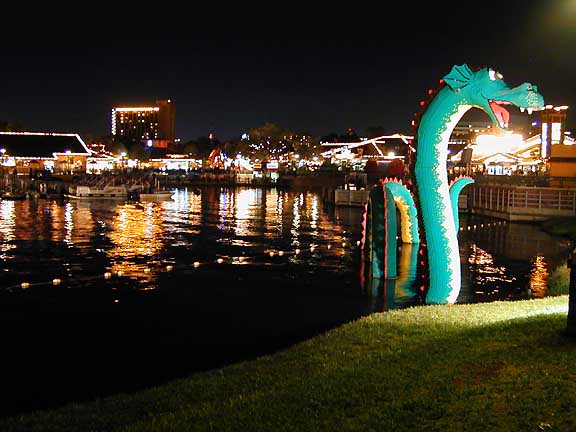
lowlight3.jpg


Downtown Disney. 1 second exposure during a fence railing to steady the camera.


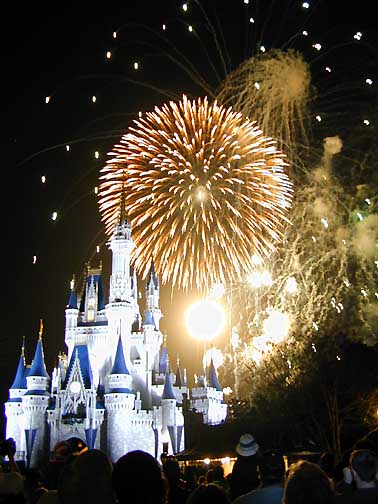
fireworks1.jpg


FITS. 1/3 second exposure using a lamppost to steady the camera.


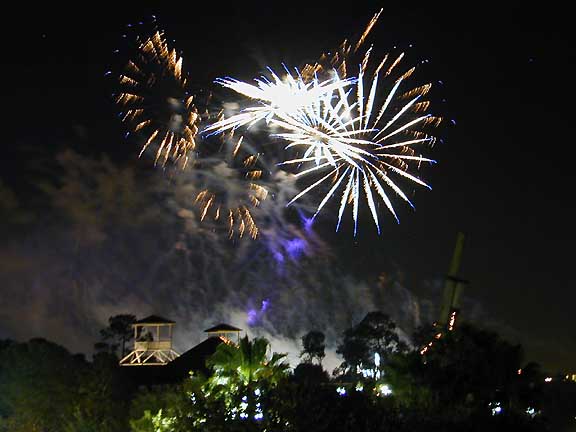
fireworks2.jpg


Illuminations from our YC balcony. I used the balcony railing to steady the camera.
 
Wow! Your pictures are beautiful. I especially love the one of the castle!

Thanks for sharing.
 
Awesome pics! I will try to remember all your tips for our WDW trip!


Awesome, awesome pics!! I really like the fireworks pics, especially the one with the castle in it!! I'm taking my 35mm camera and I think I'm going to get a couple rolls of 800 film just for the night pics I want to take. Hopefully that way I can just open up the aperature all the way and increase the speed a little bit so I don't get any blurriness. I was interested to read that you didn't use a flash. I was curious about that and you answered the question. Thanks!

Great pics!

Mark
 
I am so grateful that you posted this. I have had problems with my night shots and actually bought a better camera to try to improve them. All of my shots were blurry like the second picture. So do I assume that I change the exposure to a faster speed so that they are not blurry if it is a motion shot, like fireworks? And longer for still shots? I will say that my worst pictures were of the Osbourne lights...just a big blur!

Thanks!!! Oh and my new camera is the 5 megapixel Sony Cybershot DSCF717...the old one was 1.3 megapixel Canon A10.
 
Those are great!
I just posted on that other thread, but since this thread is focused on night shots I'll ask here too.
Night shots are important to me, do you think the lesser $$ Nikon Coolpix 2100 will do just as well?


mnbrowns,

From the looks of it, the 2100 has the same specs as my 950. As for low light / noise issues, I found this on www.imaging-resource.com:
Low-Light Tests

Surprisingly good low-light performance, suitable for exposures darker than average city street lighting at night.

Though the 2100 operates under automatic exposure control, the camera's maximum shutter time of four seconds gives it some good low-light exposure capabilities. I first attempted to shoot this series in the camera's Night Scene mode, but found that the flash was forced on and focus remained fixed at infinity. Thus, I stayed in the Manual exposure mode (which keeps aperture and shutter speed under automatic control, despite the "Manual" designation).

In my testing, the camera produced clear, bright, usable images down to the 1/4 foot-candle (2.7 lux) light level. The target was visible as low as 1/16 foot-candles (0.67 lux), but quite dim. Since average city street lighting equates to about one foot-candle, the 2100 should perform well at slightly lower light levels. Color balance was slightly warm from the Auto white balance setting, and noise was moderate. (The camera apparently automatically adjusts its ISO up to 400 for low light shooting, providing the good capability in this area, but increasing the image noise somewhat in the process.) The table below shows the best exposure I was able to obtain for each of a range of illumination levels. Images in this table (like all of my sample photos) are untouched, exactly as they came from the camera.

http://www.imaging-resource.com/PRODS/CP2100/CP21PICS.HTM

I'd also check out the well respected 4500. Nikon has a $200 rebate on them until the end of June. That'll bring the final price to around $299* for a 4.0 mega pixel camera with lots of extras.

* Correction - That's $399. Still not a bad deal, but it might be more than you were looking to spend. I paid $450 for the 950 on clearance.


Fearthisss,

I've found that people tend to reach for the 800 speed film too quickly. For one thing, it's grainy. Secondly, it's more expensive. For another, I don't think it'd buy you a lot in terms of outdoors photos after dark. It'll extend the range of your flash, but I think flash photos at night tend to have that "headlight" look to them. I'd use the 800 in lower level lighting situations like attractions were you can't use your flash. The last time I used a roll of 800 speed film was shooting cars in the rain at the Mid-Ohio Sports Car Course. The last time I used 800 speed on my digital SLR was when I was shooting batters at my daughter's softball game as the sun was fading and I needed the shutter speed to keep the bat from being a blur.

If you're using flash, 400 speed is probably fast enough for night photography.

For fireworks, 100 speed film works fine. You want a shutter speed that's about a 1/2 second. That's what makes the trails in the firework. Too fast, and the "fingers" will appear as dots as they radiate outward from the point of explosion.


lulu71,

This may be too technical, but give it a try... The rule of thumb about hand-holding a photo is that your shutter speed should be no slower than the reciprocal of the focal length of the lens. What?!!? In English: If you're using an 105mm lens on your camera, than 1/100 second should be as SLOW a shutter speed that you should try and hand-hold. It gets a little tricker with digital. You need to know the 35mm "equivalent" of your camera's lens. Because of the differences in size of a 35mm film frame and a digital camera's smaller CCD, any lens of the same length will have a telephoto effect on a when placed on a digital camera. For shopper comparisons, digital camera makers will publish what the "35mm equivalent" of a model is. For example, my CoolPix 950's zoom lens says something like 12 - 45 mm on it, but works like a 38 - 115 mm zoom lens on a 35mm camera.... So, when I have it zoomed out all the way, I shouldn't shoot at lower than 1/100 second. Then it's full wide angle, I can hand-hold it down to 1/30 second.

Motion blur sorta works the same way. There's no formula, but the wider angle a shot is, the less noticeable movement is. The difference it not dramatic, but isn't trivial either.
 
Anyway you could give us the full size versions of those pics, I think they would make great wallpaper.
 
Oh my gosh! Love all the photos, but the castle one is amazing!

Would you be willing to sell me a copy?

Lisajl
 
WOW!! Those pictures are great. The castle with the fireworks is incredible! Thanks for posting.
 
Thanks for all the compliments. I'm getting ready to go to Milwaukee to shoot the CART race there at The Milwaukee Mile and will try and get some screen saver versions ready after I get back.

I got a PM from someone that was starting out with scanners, printers, and such and asked for some info on things like exposure time, dpi, pixels, and the like. I thought there are probably others here that could benefit from the reply. There it is...

Exposure time = Shutter Speed. It's the duration of time the light has to hit the film or CCD (in the case of digital). Each speed of film requires a certain amount of "exposure" to make the photo comes out right. It's called the "EV" (Exposure Value). The "exposure" is a simple math formula: Shutter Speed * Amount of light coming thru the lens = Exposure. The required EV for 200 speed film is 2 times the EV for 400 speed film. That's why it's said that 400 speed film is "faster" than 200 speed... it only requires 1/2 the amount of EV as 200 speed to make a "proper" photo. Each time you double the speed, the EV is cut by 1/2. So 200 speed film requires 4 times the EV as 800 speed.

Notice that there's two parts of the "exposure" formula... length and the other is the amount of light coming thru the lens. The aperture (iris) of the lens controls that. The automatic exposure meter in your camera determines, based on what mode the meter is set to, both the shutter speed and aperture size to use when you press the button to take a picture.

As for "pixels" ("picture elements") that a single "dot" that you see when you zoom in real far with a digital image. My CoolPix 950 produces a 2.1 mega pixel image that is 1,200 x 1,600 pixels in size. I know 1,200 x 1,600 is only 1.92 million, 2.1 million is the number of little light sensitive "dots" on the camera's CCD, and they "fudge" a little with the marketing. So each photo from my 950 is 1,200 pixels up and down, and 1,600 pixel across. Here's were dpi (dots per inch) comes into play. If I tell Photoshop that I want this photo to be a 300 dpi image... it will produce a photo that's 4 x 5 1/3 inches in size. 1,200 / 300 = 4 1,600 / 300 = 5 1/3. If I say I want it to be 100 dpi, then it renders a 12 x 16 inch photo. But as the dpi goes down, so does the quality of the image. You'll start to see the jagged saw edges of the square pixels if you go too low.

If you're lucky, your photo editor will allow you to alter both the size and dpi of the image with is one of the tricks in turning a 750K file (the average file size of a image from the 950) into a 50K photo that your friends won't yell at you when you e-mail it to them when they only have a dial-up connection. I can tell Photoshop to make my image 72 dpi and size it to 6 x 8 inches. This makes the image only 432 pixels by 576 pixels. That's only .24 mega pixels. Fewer mega pixels... smaller file size. That's what you're looking at with the photos I posted on that thread (the horizontal ones, anyway)

Why 72 dpi? Most computer monitors "max out" the image quality at 72 dpi (newer one can go up to 96 dpi). So a 6 x 8 inch image at 72 dpi looks the same as a 6 x 8 inch image at 300 dpi on most monitors. But the differ in pixels is .24 mega pixels vs. 4.3 mega pixels!!! That's a lot of extra overhead for zero benefit. It will however, make a difference when it comes to printing. With most color printers today, once you drop below 150 dpi it starts to show up pretty fast on the print (jagged pixels).

The last trick to save the image in an internet friendly format. Jpeg is the universal format for images on the web. Jpeg is a format that compresses images as it saves them. You can control how much it compresses the image. The more compression, the lower the quality of the image is, but you save more space as the file size is smaller. Most photo editor allow you to select the "quality" setting for your Jpegs. Some programs use a scale from 1 to 10, others use 1% to 100%. The higher the number, the less compression. For computer montiors, a setting of 4 or 40% works just fine. Again, that's what I used with the images in the thread. Again, side-by-side, a 40% quality Jpeg image looks just like a 100% image... and the file size difference is staggering!

So by resizing the raw image to 6 x 8 inch at 72 dpi, and saving it as a 40% quality Jpeg, I can shrink the file size from 750K to around 50K.

For a photo editor, I'd recommend Photoshop Elements. It's under a $100 and contains around 80% of the features of it's bigger professional brother that'll cost you a small house payment.
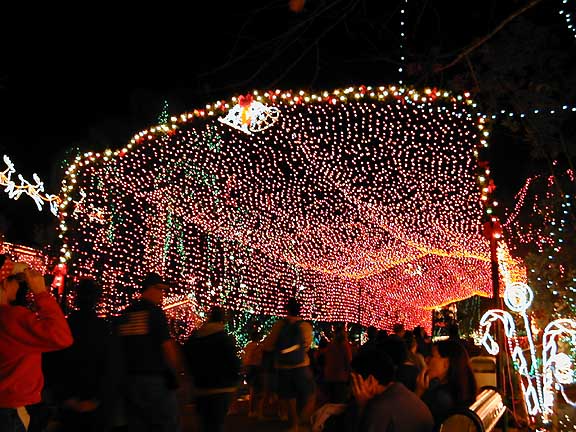
 
Thanks for the info and pictures. You sound like my kinda guy with all the technical info. I really like digging into that stuff and will say I have learned 100X more about photography in the last year since I switched to digital. I shoot many, many pictures on full manual control when I use my Minolta DImage7. I really love that camera...except that every picture has to be post processed due to the different "color-space" Minolta used.

Anyway, I'm looking forward to shooting some fireworks and other night scenes next week!
 
I have a Sony FD-97. Below is an example of some of my shots. I love your shots and appreciate the info you have shared. When I go in November I hope I can put some of your tips to use. Night shots are an area I need all the help I can get.
 
Thanks for the tips, Geoff. Now I've got to practice, practice, practice!!
 
Braves Fan,

Looks like you're barking up the right tree.
 

GET A DISNEY VACATION QUOTE

Dreams Unlimited Travel is committed to providing you with the very best vacation planning experience possible. Our Vacation Planners are experts and will share their honest advice to help you have a magical vacation.

Let us help you with your next Disney Vacation!


facebook twitter
Top