To Infinity and Beyond - Becoming a Better DopeyBadger (Comments Welcome)

Wishing the best for your family Billy. As always, you're a role model for a good, balanced attitude.

Hope your mother in law’s health improves. Disney is always a good way to cheer everyone up.


I was recently going to ask you how things were going since you've been unusually quiet. Thanks for sharing an update. My best to you and your family.

Well said. Running goals can be modified and adjusted when it's appropriate to give them their season.

But when pursued at the cost of family, achieving your running goals will never replace what you lost with your family.

Sending prayers and positive vibes for your MIL and family… living fully day to day is the blessing..

Thanks all.
 
Just an update. Life remains busy. I'm fitting in running when I can, and made the right decision not to over commit myself in doing the marathon training plan I had previously laid out. My family needs me more than my running goals do at the moment.

I had planned on doing some running not long after returning from Disneyland, but on two separate occasions had overnight calf camps that lingered for a few days. So things kept getting pushed back. I ended up taking nearly two weeks completely off which worked out because the time commitment at work was intense through the end of January. Since then, I've been doing about 15-20 miles per week (2-3 hrs) all at an easy pace. I considered maybe doing mile training because it has a lesser time commitment, but things just aren't lining up at the moment as I need to stay flexible between work and home life. I'm hoping as things become more normal and routine, then I can add back in my own routine of getting back out there.

MIL had to pivot to chemo treatment and it's been up and down on tolerance. So that's been tough on everyone. We're looking at trying to go to Disney in March with everyone again to keep things on the horizon for incentive. But it remains to be seen.

G was casted in the local high school play of Wizard of Oz as a munchkin. We've also been playing a lot (too much) of Palworld. Soon we'll get started on our Amphibia costumes. I think we've finally got all the necessary equipment to get started.

That's about where things are at the moment. I'm hoping to get back to regular updates and getting the routine back.
I am really sorry about what your MIL is going through. I wish the best for you and your family.


Hoping that your MIL comes through chemo well, and that you and your family are coping as best you can.
 
Thanks for the update. I think about what you and your family is going though and how you can possibly be running the same. If you were, then you are definitely superman. On the flip side, letting us know that right now it is just hard to commit to running is helping me. My mom is also having issues and i have just had to sometimes let the exercise go. Trying to give myself grace, so please remember to give yourself grace.

Peace and hugs.


I’m so sorry to hear things are tough with your mother in law and her battle. I’ll be sending good thoughts to you all, and hoping you all have a lot of support. I think I speak for a lot of us here that if you need anything to please let us know; you’ve been so helpful to really everyone on here that I know a bunch of people would jump at being able to return the favor.

One thing to consider with your trip is to see if you can get your mother in law signed up for DAS (Disability access service). This should allow her and a certain number of people in her party (I can’t remember how many, maybe 4 or 5?) to get a time to come back to the attraction, sort of like the old fast pass lines. They also might have suggestions or ideas on how to make your trip easier and less stressful. I know have people coming in all the time that are going through chemo so I’m sure they have a bunch of experience going through situations like this.

Best wishes to you and your family.
 
Amphibia Costumes - Anne's Hair - Part 1

Been a few months, but felt it was time for a little bit of catch-up on the progress for the Amphibia costumes for Anne and Darcy. I've been able to carve out some time here and there have made a little progress.

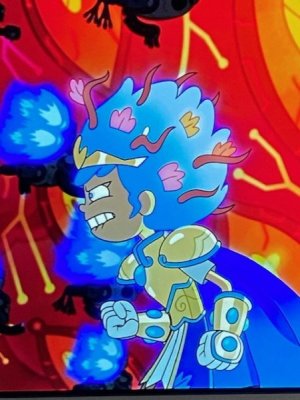
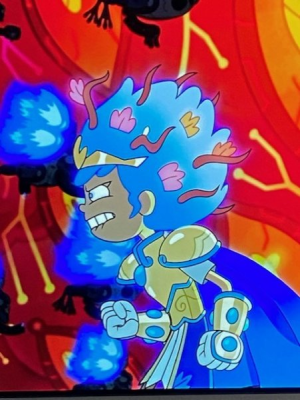
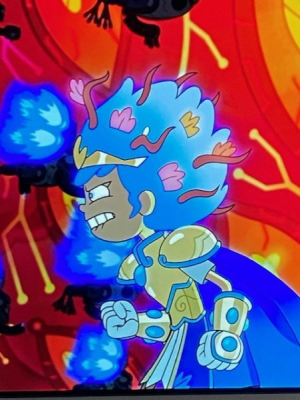
As a reminder, G wants to be Anne from Amphibia in her final calamity form.

thumbnail_IMG_6850.jpg

The goal is to create a hair piece that is super glowy. We tossed back and forth on how to go about it. Does she want it to look cartoony or does she want it to look like real hair? We went through a bunch of trouble shooting ideas not pictured here, but lots of cutting out of paper in hand drawn curves to try and figure out how to make swooshes of hair in foam form. In my mind, the hair is a lot like Goku from Dragon Ball when he achieves his super sayian form. So I did some youtubing to see if anyone else had done something similar with glowing blue hair. I found this video on youtube and G and I were sold on the look.


He doesn't give any commentary, but we got the gist of it. The key thing we weren't planning on doing but now found ourselves interested in was overlaying wig hair over the translucent foam to have a mix of cartoony and realism. It really was the best of both worlds. So we set out to emulate some of the things found in the youtube video.

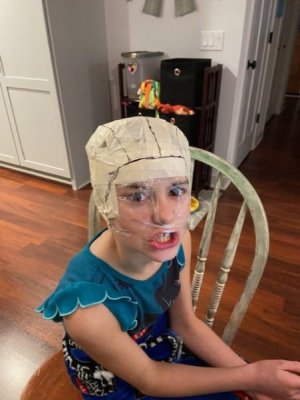
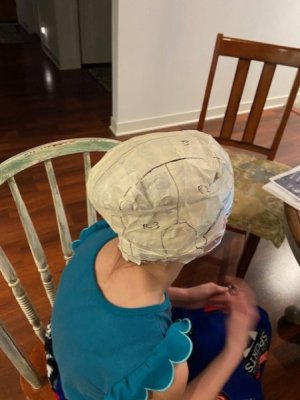
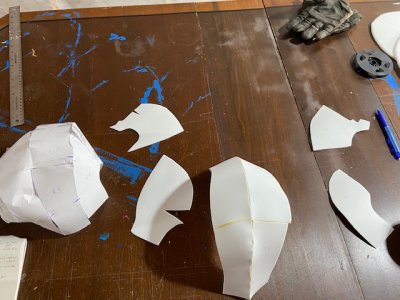
In a separate youtube video, we learned how to make a skull cap specific to yourself. That way it can give you a reasonably good fit. So we had G do her hair in an Elsa braid just as she plans to do on costume day. This way the cap is made specific to that shape. Then we wrapped her head in cling wrap, and then put masking tape over the top.

thumbnail_IMG_6871.jpg

thumbnail_IMG_6872.jpg

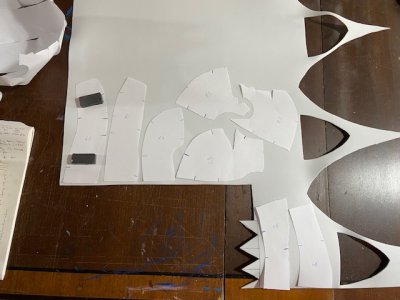
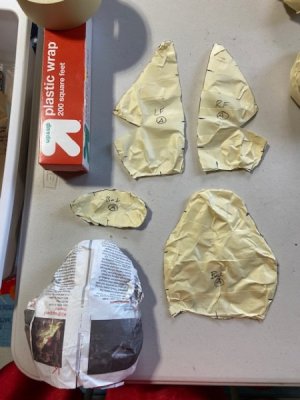
I then drew in sharpie the outline of the skull cap, with letters and numbers to keep the pieces straight. Lastly, we drew lines in between the pieces so that when I put it back together, I've got guide lines for aligning the pieces. I used a small pair of scissors to carefully cut away the plastic wrap and masking tape from her head, and then cut each piece out individually.

I first traced the masking tape design on paper, giving myself an extra 5 or so mm around the edge. This was because the masking tape is flat, whereas the foam will have some thickness. So when the foam curves, it's going to be slightly smaller on the head than your original design. We tested the skull cap in paper form, and then moved to foam.

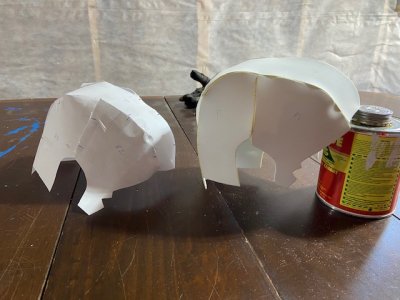
For the foam, we're using 2mm standard foam (link). Since this will be under everything else, it doesn't need to be translucent, and it doesn't need to look pretty. We traced out the pieces on the foam, and then cut them out.

thumbnail_IMG_6914.jpg

We used Barge cement (link) to attach the pieces together. As a reminder, when working with Barge cement a little goes a long way. So put a very thin layer on the pieces. Allow it to air dry for 3-5 min, with some gentle blowing on it. And then slowly put the two pieces together starting with a guide line and then working it down to attach it everywhere. The seal is quick, and within 5-10 min is solid.

thumbnail_IMG_6915.jpg

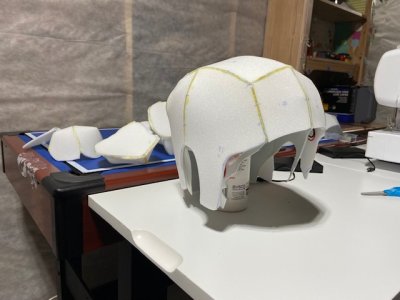
And before too long, we had a complete skull cap.

thumbnail_IMG_6917.jpg

It turned out maybe a touch larger than we wanted, but not too bad. Once we put it on G, we found a few places that needed to be cleaned up, but by in large it was a good fit.

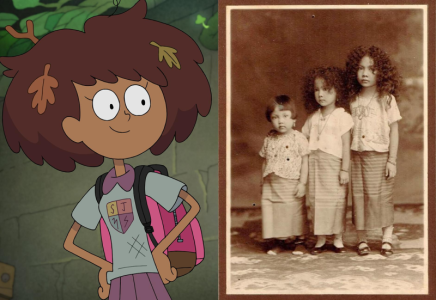
So Goku's hair is kind of easy. It's mostly spikes/horn shaped and comes to a pointy tip. That's not like Anne's hair with has blunted tips, and not a lot of additional shape to it. We also learned in the process that Anne's hair is made after the creator's grandmother who had a ton of curls.

1711374957719.png

So G through a curveball and wanted the curls to be incorporated as well. It's kind of hard to visualize Anne's cartoon hair in real life. The hard part was trying to make the shapes and match G's thoughts on what it should look like. Admittedly it was a really frustrating process because she's got a specific look in mind, but hard to free hand it into existence.

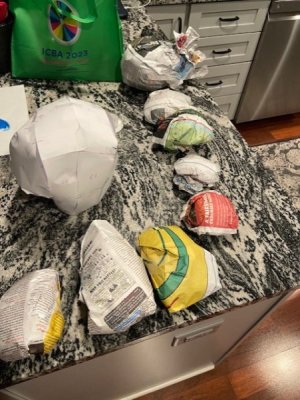
While doing some youtube digging I stumbled upon a solution. Use newspaper to make forms of what you want to make in real life. Then like the skull cap, you wrap it in saran wrap and masking tape to make a pattern you can trace out. So we played around with newspaper to get some of the desired shapes.

thumbnail_IMG_6895.jpg


thumbnail_IMG_6919.jpg

After several weeks, we finally felt like we were making some progress.

Next -Anne's Hair - Part 2
 
Last edited:
Amphibia Costumes - Anne's Hair - Part 2

With the shape of Anne's hair starting to come together, it was time to make some decisions on how to make it glow. We've used several different options in the past for illumination. For Anne's hair, we're looking for a static single color. So that enabled us to use the same LEDs we used for the Monster's Inc. laugh canister gauge. It's a 352 LED/m strip from Adafruit powered by 8AA batteries (link). They've got a blue strip, and also cool white. Originally, we planned on using the blue one, but then when it arrived we questioned whether blue light in combination with something that has it's own color when offset it. So we ordered a white strip as well to do some comparisons.

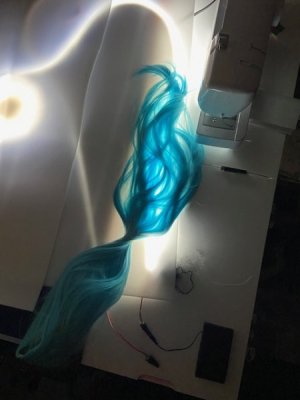
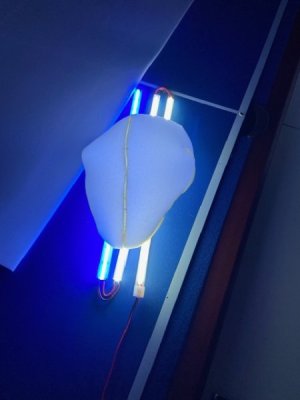
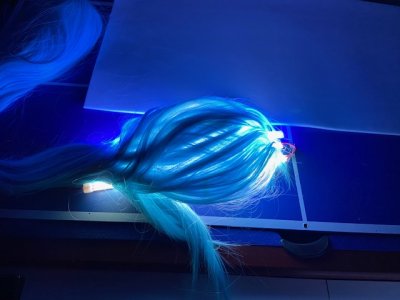
We also ordered two different wigs that we would trim down at a later time to emulate the Goku cosplay. The wig hair arrived slightly more blue-green than intended, so I'm not sold on whether we'll order another wig. But for the moment and just for testing procedures we're going with it. So this is the wig overlayed on the blue LED with a piece of 2mm LD50 translucent foam in between.

thumbnail_IMG_6891.jpg

And then is with the white light.

thumbnail_IMG_6892.jpg

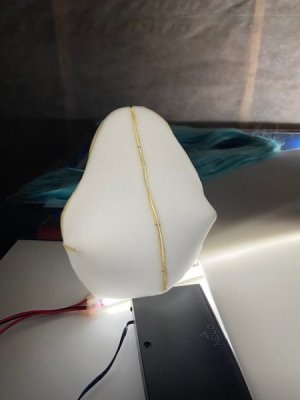
It's pretty clear there's a big difference there. The blue light is dimmer and makes the hair look much darker, almost black. Whereas the white light allows the natural color of the hair to shine through, and provides more illumination. So we were leaning towards the white light. But then I had a crazy idea, what if we used both. Would it be possible to cut the LEDs and put them together in series? So that we could have a single power source do both the blue and white lights simultaneously? I did some googling and the answer was immediately obvious. So I just went with it in testing. But before doing that, I got a second power source and just turned on the white and blue together, just to see.

White on LD50 foam
thumbnail_IMG_6922.jpg

Blue on LD50 foam

thumbnail_IMG_6920.jpg

White and blue on LD50 foam

thumbnail_IMG_6921.jpg

It doesn't come out in the picture all that well, but the blue/white combo is definitely brighter and has a slight blue hue to the color. So it looks good. Next goal was to see if it was possible to connect them in series.

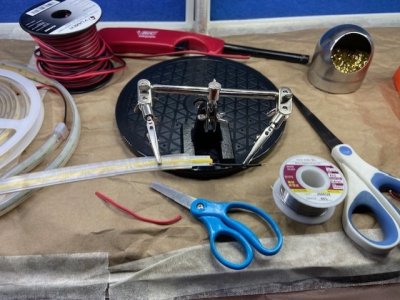
Equipment for soldering:

Heat Shrink Tubing
Wire Stripper
Helping Hand
Solder Tip Cleaner
Solder Iron

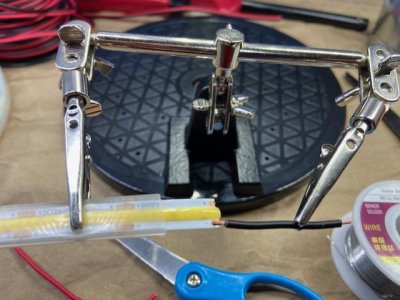
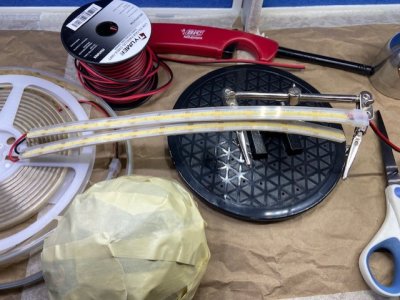
The 352 LED/m strip is really easy to work with. It has cut points every inch or so with copper plates on either side. So you can easily cut it to length and then solder some wire between.

thumbnail_IMG_6923.jpg

thumbnail_IMG_6924.jpg

There's a positive and negative terminal on opposite sides of the LED. The LED also has a plastic sheeting around it which does make it easier to work with without worrying about damaging the LED itself. With that being said, it's not very flexible. So it can't easily make turns on a small surface such as G's skull cap. So it was necessary to make small turns with the wires so that I could maneuver the whole thing on to the cap.

thumbnail_IMG_6925.jpg

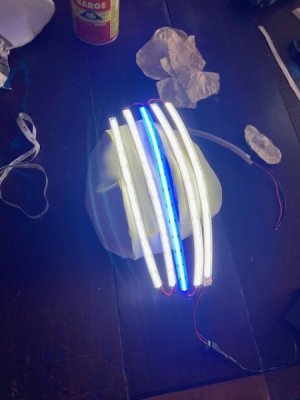
After each connection of about 12 inches of LED, I would plug it in to test whether the system was still working. Over the top of the skull cap I decided to do five total strands of 12 inches each, four of which were white, and one was blue. So the first two white worked together, and then the moment of truth with the third strand being blue.

thumbnail_IMG_6929.jpg

Winner winner! We've got a working system! What this will enable us to do is use primarily white for illumination purposes and then touches of blue to give the hair some dimension (at least that's the hope).

thumbnail_IMG_6930.jpg

G and I were very pleased. From there it was just a matter of stringing together all of the LEDs. The whole process took a few hours because each wire length had to be precisely measured and I had to be careful not to put things in the wrong direction.

Next -Anne's Hair - Part 3
 
Last edited:
Amphibia Costumes - Anne's Hair - Part 3

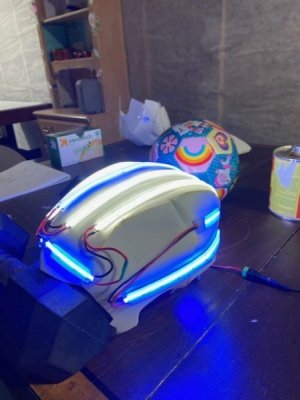
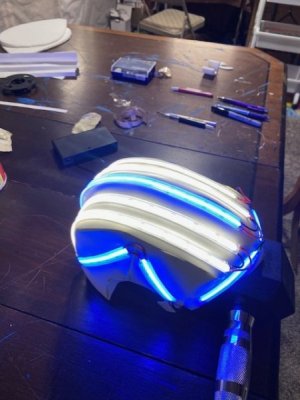
So like I said last time, the next part was attaching all of the LEDs to the skull cap in sequence. The LEDs come with a glue backing, but some of them didn't work well. So I used Barge cement in some areas to hold them down. In all, we used 1 meter of blue (352 LEDs) and 1.33 meter of white (640 LEDs). So in all there are 992 LEDs on the skull cap illuminated with a single 8 AA battery pack. As a side note, we tried using a 6 AA battery pack with standard AA batteries but while the voltage was matching to 8 rechargeable batteries, it didn't have enough juice to light it up.

So here's the helmet when we had just the 5 strips originally made, but not yet attached.

thumbnail_IMG_6933.jpg

Then I made the other half of the system and attached them in the middle. The forehead was tricky because of the tight bend and the solder broke twice on me, so I ended up cutting that LED in half and it took some of the pressure off of it. Attached the LEDs with glue/cement to the skull cap, and then turned it on!

During the daytime:

thumbnail_IMG_6934.jpg

thumbnail_IMG_6935.jpg

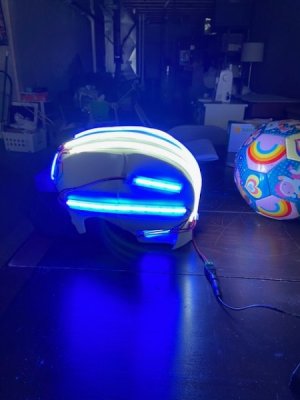
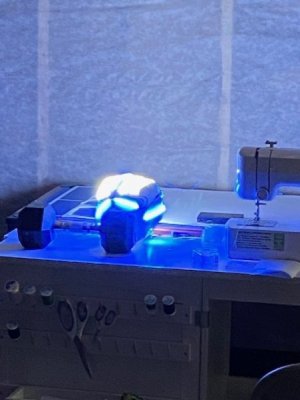
During the night time:

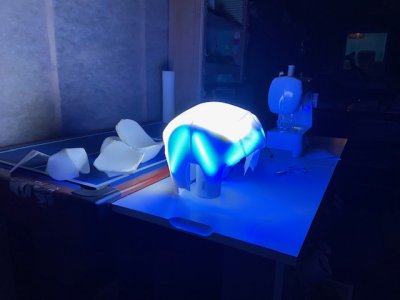
thumbnail_IMG_6936.jpg

thumbnail_IMG_6937.jpg

thumbnail_IMG_6938.jpg

thumbnail_IMG_6939.jpg

thumbnail_IMG_6940.jpg

It's pretty frickin' bright. Not quite, it'll blind you if you look at it, but still pretty darn bright. Which it needs to be because it'll be covered with a layer of foam and wig hair. So we're in a good place now. The next step is combining the skull cap and the translucent foam into one single piece.

Next - Anne's Hair- Part 4
 
Last edited:
Amphibia Costumes - Anne's Hair - Part 4

Alright, we left off after having finished the base skull cap layer and having attached the nearly 1000 LEDs to it. The next decision to make was how to make the shape/form of Anne's hair.

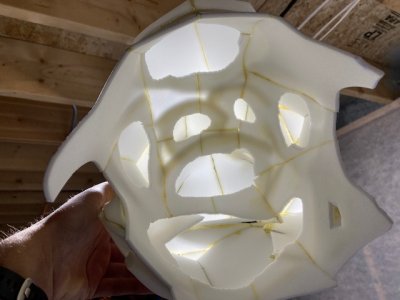
Anne has a fairly large hair-do in her final calamity form. By my measurements the size of her face frontwards, is roughly equal to the amount her hair goes outwards from her face. Additionally, the distance from the front of her face to the back of her ear is roughly equal to the distance from the back of the ear to the furthest point in her hair-do. So I needed to make the whole thing bigger with foam. The decision I needed to make was whether to make the second skull cap layer out of Plastazote translucent foam or just standard cosplay foam. The reason I needed to weigh these two options was because once the hair-do starts to take shape, then I'll cut away some of the insides to allow the LED light to only have to pass through one layer of translucent foam. Conversely some of the second layer skull cap will remain and if it's not translucent then light can't get past it as easily. The decision comes down to cost as the plastazote foam is about twice the cost of regular cosplay foam. I decided that since I was already spending a decent amount on the project a few dollars here or there is small potatoes. So I used the plastazote to make the second skull cap layer.

So I had G put the first skull cap layer back on again, and then we did the whole saran wrap and masking tape routine again. Kid was a literal squirrel. Couldn't keep her still for the 5-10 minutes it would take to do this process. Ended up having her stand in a corner with no TV, music, or other distractions just so we could finish this part of the project. What a goof! All in all it turned out pretty good.

thumbnail_IMG_6944.jpg

You can see the second layer overlayed over the first layer in the above.

Turned on the lights and everything was still working.

thumbnail_IMG_6946.jpg

It's a tight fit, so I probably want to limit the number of times I'm putting the two pieces together. I had originally planned on not sealing the two together at the end so that if something went wrong with the wiring it would be easy to access it, but after putting them together temporarily here, I'm re-thinking the long term choice I'll have to eventually make.

G said the fit was still good and wanted to check herself out.

thumbnail_IMG_6943.jpg

Next up was making some of the form shapes. We started out with the newspaper wrapped in saran wrap and masking tape idea. We had the shapes we liked, but they just didn't look right on the hair piece itself. They looked too rigid and without movement in them. So we went back to one of our original ideas which was using a pattern from Kamui Cosplay for Dragon shoulder armor pieces (link). We liked it because that top piece has a lot of movement and form to it. Something we can work with and make some small edits so not every piece is the same.

thumbnail_IMG_6949.jpg

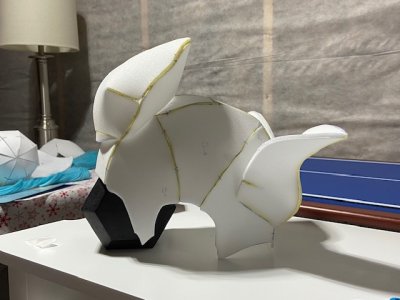
So the front piece was on of the newspaper ones we really liked, and then that large piece on the back is one of the Dragon shoulder patterns. You can look at the profile of the picture above and compare it to the side profile of Anne's hair to see what we're going for.

1711655782199.png

I'm leaving the space by that front piece to tuck in the crown she wears.

G and I went back and forth on additional pieces because we were entering a permanent zone where whatever decisions we made were going to be pretty hard to reverse and start over. So we had to be careful with every choice for the next bit. We ended up deciding it would be easier to build from the back of the head and the front piece than starting with that large middle piece and building around it. Just so the edges of the hair-do "made sense" and we're slapped together with whatever room was remaining. So we cut out two new dragon pattern pieces with some edits to the pattern, shape and size, and stuck them to the back in a manner we thought looked decent.

thumbnail_IMG_6951.jpg

Despite our desire to not make any wrong moves here, it was really hard to see the final product as we added these pieces on. They looked like weird horns, or weird ears depending on where you put them. But we convinced ourselves that we just have to see it through and hopefully it'll make more sense as we keep adding more. So we glued those two down.

thumbnail_IMG_6956.jpg

Also had to add a little bit of foam to the front piece to get it aligned and leave room for the crown. G and I discussed bangs, but that's not a decision we have to make yet. But she's a fan of the rounded bangs you see in the cartoon version, and I'm a fan of doing curls on the front to pay homage to the inspiration behind the character. We'll see what makes sense further on.

So I did some measuring with the width and length of the hair, and decided that we were good width wise, but were still missing the necessary depth based on our measurements. We went ahead and added another piece on the back.

I decided just to place the whole piece over the skull cap with LEDs because I wanted to confirm we were on the right path still. The multiple layers of foam does reduce the intensity, but ultimately most of those extra layers will be removed at a later time once the whole piece is finished.

thumbnail_IMG_6959.jpg

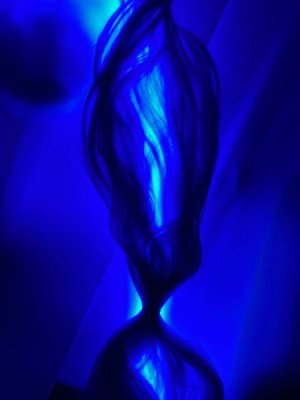
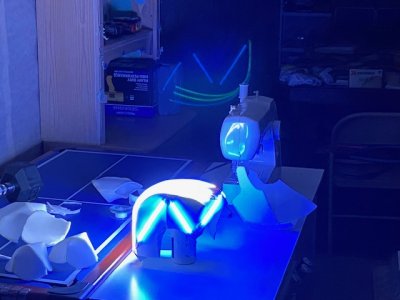
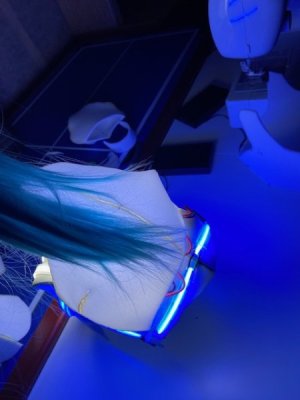
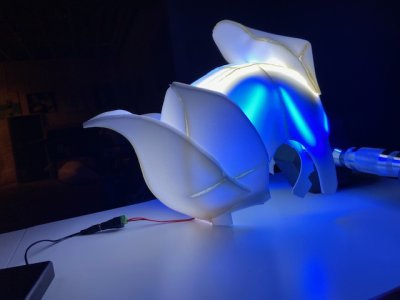
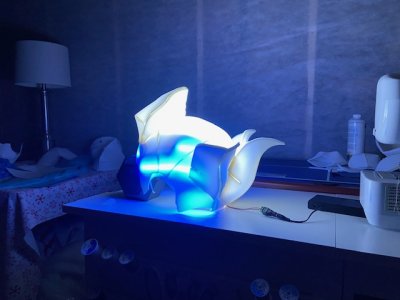
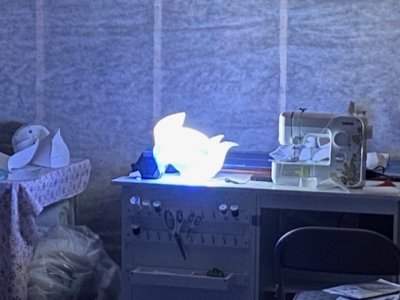
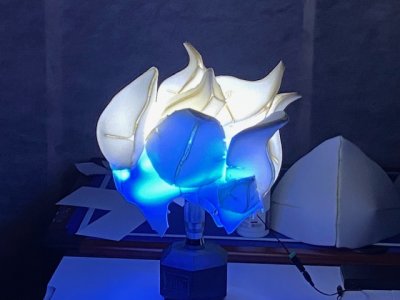
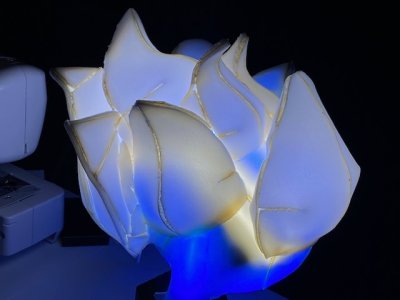
But the use of blue and white LEDs looks like it's going to have the desire effect of making the hair glow differently based on where you're looking at it.

thumbnail_IMG_6957.jpg

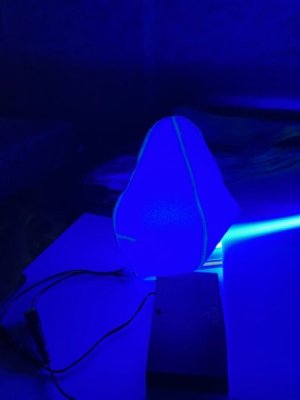
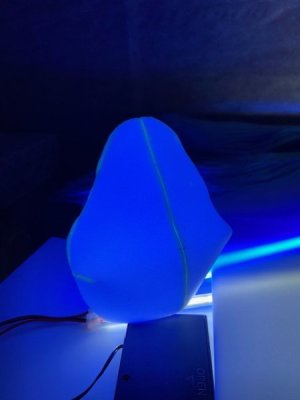
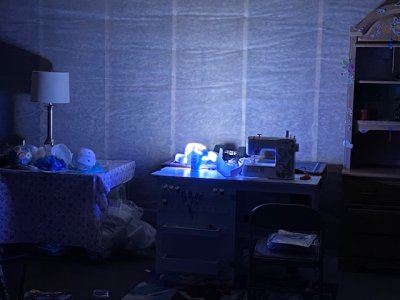
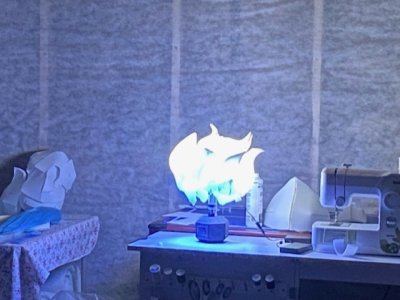
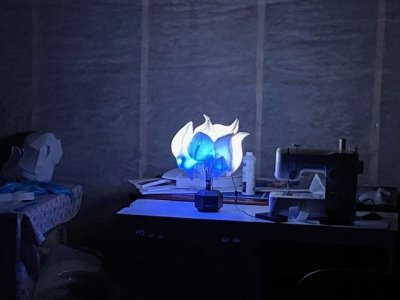
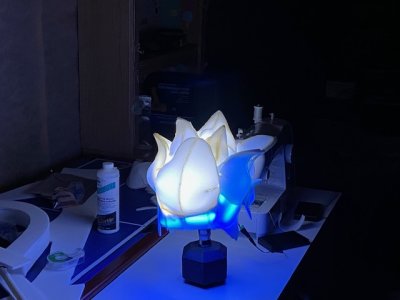
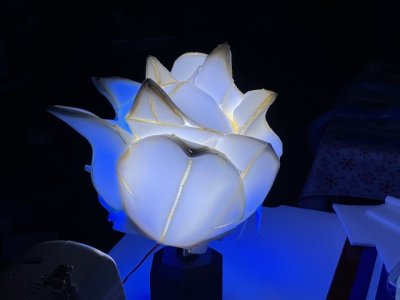
And of course, when I turn all the lights off, then the iPhone just goes crazy and makes it look like a legit glowing wig. This is just a camera effect though and it doesn't really look this like.

thumbnail_IMG_6960.jpg

Just have to keep adding more pieces to it to fill it out, but I think we're heading in the right direction.

Next -
 
I love how thoughtful and thorough you and G are with your costumes! Can you remind me what this costume is for?
 
Amphibia Costumes - Anne's Hair - Part 5

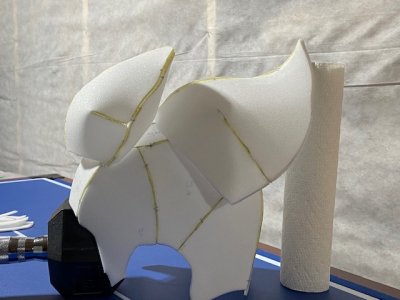
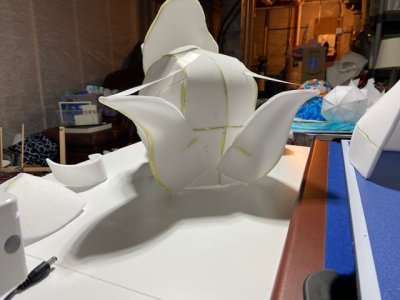
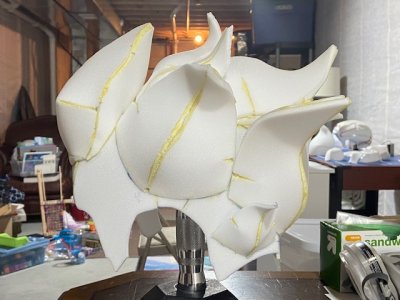
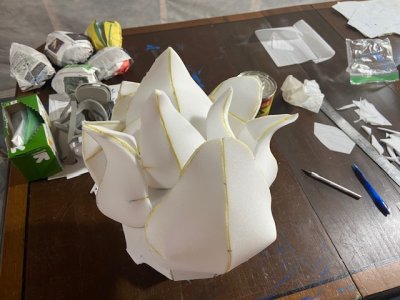
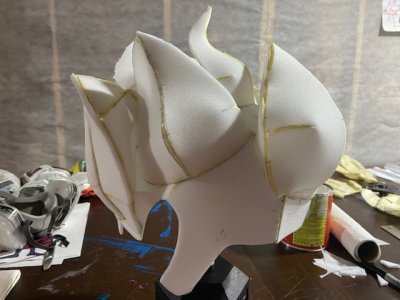
Alright, so we last left off having added the back two pieces of foam form and the front piece. The next job was to fill in the remainder of the space with several more swishes of foam. All of them followed the same dragon armor pattern with slight edits on the pattern on each not to be completely repetitive.

thumbnail_IMG_6963.jpg

Now at this point I had gotten most of the "2-D" dragon patterns where I wanted them, but the downside of the "2-D" structure is that the light won't be captured by the piece quite the same unless it's 3-D. Because if the bottom side is hollowed out, then the light will bounce up into the foam piece and illuminate it more. But if it's just a 2-D structure then it just kind of illuminates the area. So you can kind of see in the image above that process starting with the piece towards the left of the image just behind the ear hole. This was a major jigsaw. As I had to Frankenstein pieces to fit in these holes, with all sorts of 3-D shapes going on. A lot like the Ms. Marvel fist I made two years ago. The process was tedious and took a lot of time cutting each foam piece to shape. Three things helped expedite the process.

1) To this point the majority of the piece was made with 6 mm foam. However, for these additional pieces I used 4mm foam because it was slightly more flexible and could more easily fit in the small spaces.

2) On occasion I used parchment paper because I could see through it to the other side to get a general idea of the 3-D shape I was making.

3) I used far less Barge cement with a very thin layer. Back in the Ms Marvel fist days I was slathering it on and it took forever for it to dry and seal. With a thin layer it's a near instant bond after you give it 5-10 min to dry before attaching the pieces together.

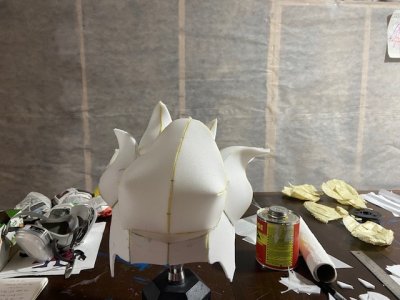
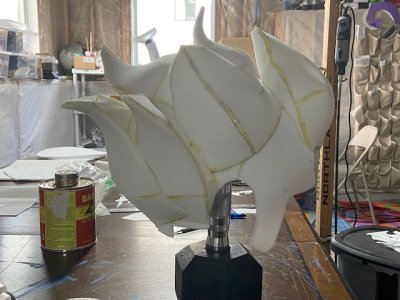
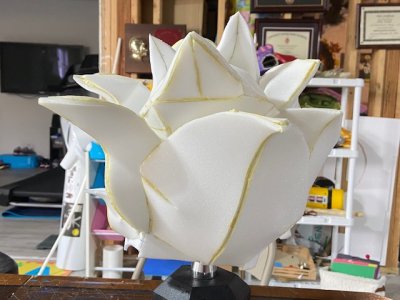
Finally, I had completely closed off the entire piece with some 3-D structure to it.

thumbnail_IMG_6964.jpg

thumbnail_IMG_6967.jpg

thumbnail_IMG_6968.jpg

thumbnail_IMG_6969.jpg

thumbnail_IMG_6970.jpg

Looks like I didn't take any picture of the complete complete version, but this was close. With this done, it was time to re-check the look with all the pieces in place.

thumbnail_IMG_6972.jpg

thumbnail_IMG_6973.jpg

thumbnail_IMG_6974.jpg

thumbnail_IMG_6976.jpg

It really was coming together. I didn't like how one 3-D structure turned out (the one at 2 o'clock) in the image above. So I remove the 3-D piece and re-did it to allow more light to be captured. It was too thin.

The next step was removing some of the 2nd skull cap layer on the underneath so that the light from the LEDs had to pass through minimal layers of foam to reach the hair tips. This would brighten the overall appearance of the piece.

Next -
 
Amphibia Costumes - Anne's Hair - Part 6

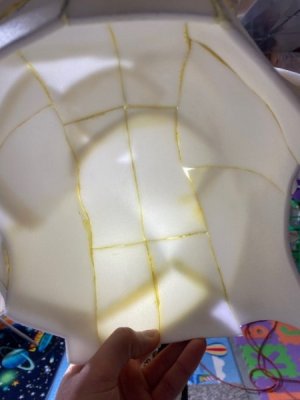
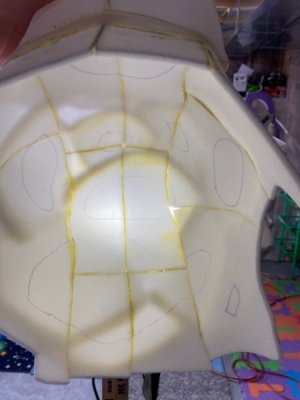
So I held the piece up to a very bright light and that allowed me to see the shadows of where the connections of the foam tips were on the other side.

thumbnail_IMG_6982.jpg

I tried to balance the structural integrity of the piece with the desire to remove excess layers to allow more light to pass through. So I went through the piece and marked where I wanted to cut out.

thumbnail_IMG_6985.jpg

I thought it was going to be harder to remove those inner layers of foam, but the standard exact blade was sufficient. I just had to make a small cut and then carefully saw around the lines that I had drawn. As long as I held the foam, then it didn't rock back and forth too much in the cutting motions and didn't tear apart other areas.

thumbnail_IMG_6990.jpg

Just the comparison of the first and third images above shows you how much more light passes through the foam when there's less layers.

So I placed the piece back on the LEDs and fired it up. But it didn't work... I was freaked for a moment there and figured maybe the batteries were out. So I tried the other battery pack and nothing... Oh no. It's got to be bad if not a single LED strip comes on because it should work up until the damage to the sequence of wiring. So I carefully removed the base skull layer and inspected the piece to find the faulty wire. Thankfully it was an easy find as it was the second connection in the sequence. So I soldered it back into place and then fired it up again. It was working. So I placed it back on the headpiece to get a look at our near final color display.

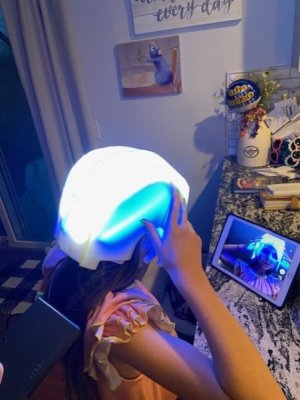
thumbnail_IMG_6992.jpg

thumbnail_IMG_6993.jpg

thumbnail_IMG_6994.jpg

thumbnail_IMG_6995.jpg

I'd be lying if I didn't say it brought a tear to my eye to see the piece lit up. It's honestly so on point for what we're going for and at this point I couldn't be happier with taking it from concept to this stage in the design.

Next up was learning how to use the airbrush kit as we get ready to make some leaves and sticks that are stuck in Anne's hair! G's really excited to learn how to airbrush with all of her new equipment!

Next -
 
Amphibia Costumes - Anne's Hair - Part 7

As Rafiki says, "It is time!"

We're at the point in our cosplay adventure that it's time to add a new skill to our arsenal. The use of airbrush painting. While it's not hyper critical for Anne's hair sticks/leaves that are stuck in her hair to be painted using airbrush, I think it'll help. Where the airbrushing becomes critical is the armor to give it the appearance of metal. And since we're super stoked about trying out all the new equipment we got, we went ahead and chose to do the leaves/sticks with airbrushing. So first off, what is all of the equipment we're using.

Adult respirator
Child respirator
Cleaning swabs
Acetone
Dropper
2x VIVOHOME Airbrush Booth
Master Airbrush kit
Airbrush jar and cleaning kit
Master Airbrush cleaner
Basic nitrile gloves
Vallejo Model Air airbrush paints

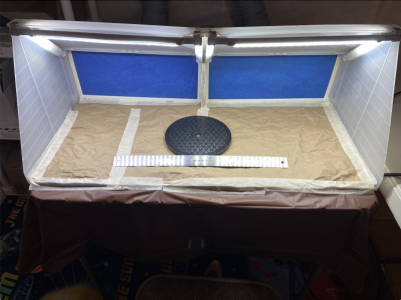
and there's plenty of other paints being used for the armor that I'll detail at a later point. But I think that covers everything. The key was the airbrush booth itself. I couldn't find a reasonably priced residential airbrush booth that was large enough to do cosplay items in. Most were meant for small models like cars, toy soldiers, etc. But then I saw someone mention that the design of the VIVOHOME booth (and a few exact matches) was sleek enough that you could stick side by side and use them as one larger booth. Each booth is 13.5 inches tall, 14 inches deep, and then 16.5 inches wide. So side by side gave me 33 inches of workspace which is about the size of a standard square card table. Definitely doable.

1711995699558.png

It's got plenty of bright LEDs, vents outside through some hosing, has air filters, etc. I just taped the two middle together and I'm not getting any leakage best I can tell. So it'll be pushing it on some larger pieces like the chest armor, but for most items will be sufficient.

So first up was the leaves in Anne's hair.

1711995851498.png

They mostly appear as red/pink, orange or yellow and usually have a pattern of three leaflets (sometimes four) or a really small tiny one. So I had G draw out some patterns on paper and then we used those concepts to trace out some ideas on foam. Cut them out, and then compared them to the scale of the already made headpiece to see what we thought.

thumbnail_IMG_6979.jpg

thumbnail_IMG_6980.jpg

thumbnail_IMG_6981.jpg

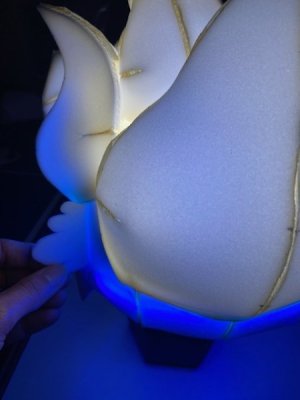
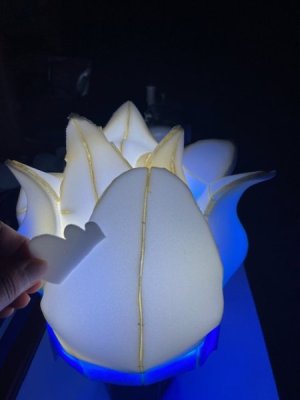
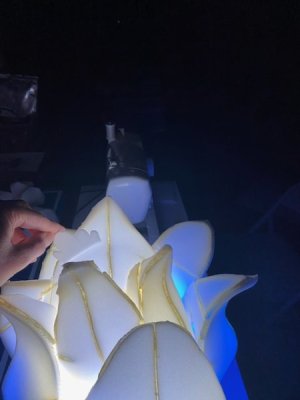
The hope was that the flat leaves would illuminate, but as you can see they don't. They are illuminated in the presence of light, but aren't reflecting that light (if that makes sense). And it's for much the same reason as why I widened the 3-D structure on some of the tips. If it doesn't capture the light, then it hardly glows. So that's a decision we might have to make at some point soon. Do we do 3-D leaves that you don't typically see in real life, or keep them 2-D and be fine with them not glowing as much as G would like them to? For now, we're moving forward with 2-D leaves, and then we'll make a decision later.

So after cutting out the pieces, I got the airbrush equipment all set up. My FIL (G's grandfather) came over to show us how to use the airbrush equipment. He has an art degree from UW Madison from a long time ago, as well as a lifetime of experience using airbrush equipment on cars. So he was the right person to give us some basic pointers. We learned how to get everything properly attached. Also, how to hold the airbrush pen in our hands. How to push down releases the air, and to pull back releases the paint. Also, how you have to push down for about 3 seconds before pulling back, because the air pressure needs to stabilize. Using distance to dictate the appearance of the spray pattern, and how far you pull back on the lever for density of paint. We had these gripping alligator clips on the end of a metal rod that came with the airbrush booth that are meant to hold small plastic pieces as you airbrush them. Problem is those damage the foam. So thankfully we had the nitrile gloves because then I could just hold the item as I sprayed it. Couldn't just spray it without holding because the force of air just pushes it away.

We also learned that a little bit of Vallejo airbrush paint can go a long way. So only need a few drops to do multiple leaves. With that in mind, it's super tricky to clean the airbrush gun in between colors, so you really want to plan your day out in terms of color choices. Because going back and forth like paint brushes doesn't work well. So to clean the airbrush we used the Master Airbrush brand cleaner. Put some in the airbrush pen, shake it, rub around with a cleaning swab, and then spray it into the airbrush pot. The cleaner is advertised as safe and non-toxic, but it definitely had an odor about it when the respirators weren't on. So that's a "inside the hood" only type thing moving forward.

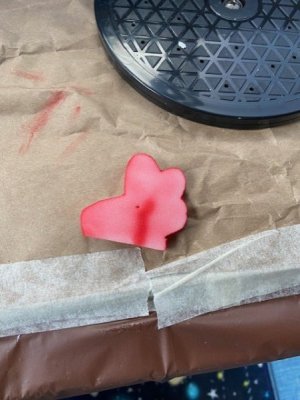
We started off with a red leaf first. The goal was a light enough paint coating that gave it color, but didn't infringe on the ability of the leaf to be translucent. I decided to do a soft coating of red paint, and then do a heavy cut on the outer rim to give it some definition. The middle stem was a little messier than I'd like. FIL has the idea that if we wanted a cleaner line we should try using a slitted stencil and paint in between it. That or purchase a different kind of tip.

thumbnail_IMG_6986.jpg

All in all though, I like the look of it.

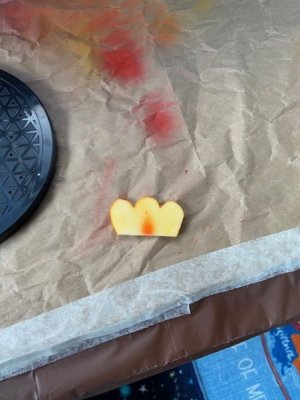
Next up we moved to yellow. We got the pen "clean" but not nearly clean enough. Because yellow wasn't quite yellow and it was more orange. Which worked out fine anyways because we wanted to do orange too. Just goes to show you really have to deep clean between colors to ensure it's all gone.

thumbnail_IMG_6987.jpg

We then compared those leaves to the foam hairpiece for size and color.

thumbnail_IMG_6988.jpg

I liked the look of it (shape, color, and size). We also compared it to the wig hair.

thumbnail_IMG_6989.jpg

I think it's got a good color pop to the combo. So we're definitely heading in the right direction. The question was whether it would glow like we wanted when the hairpiece was turned on.

Next -
 

GET A DISNEY VACATION QUOTE

Dreams Unlimited Travel is committed to providing you with the very best vacation planning experience possible. Our Vacation Planners are experts and will share their honest advice to help you have a magical vacation.

Let us help you with your next Disney Vacation!


facebook twitter
Top